Light and Exposure Modes
Here is a quick intro on exposure techniques, because sometimes it can become confusing which one you should use, and why.
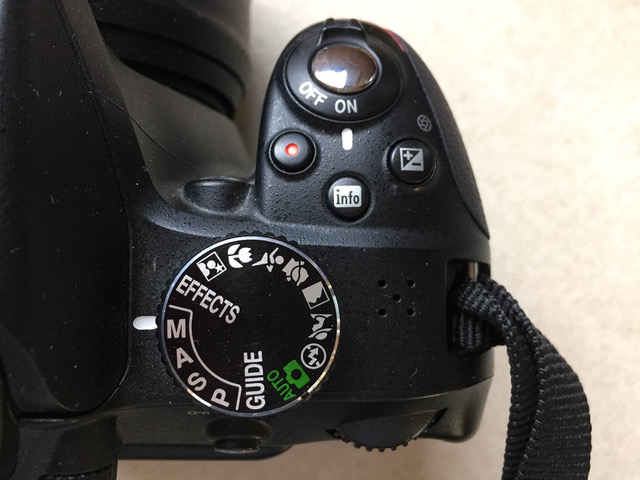
The four exposure modes found on the dial button (pic 1) are:
P - program mode, it is a quite similar to the Auto mode, the camera chooses both the shutter and the aperture, but you can still play with the ISO, ideal for general use.
A - aperture mode, you can choose the aperture and the ISO, and your camera will set the shutter speed. You can use this setting especially when you want to have a blurry background.
S - shutter mode, you can choose the shutter speed and the ISO, and your camera will set the aperture. You can use this when there is a lot of action in the background.
M - manual mode, is when you set all three variables (ISO, aperture and shutter speed).
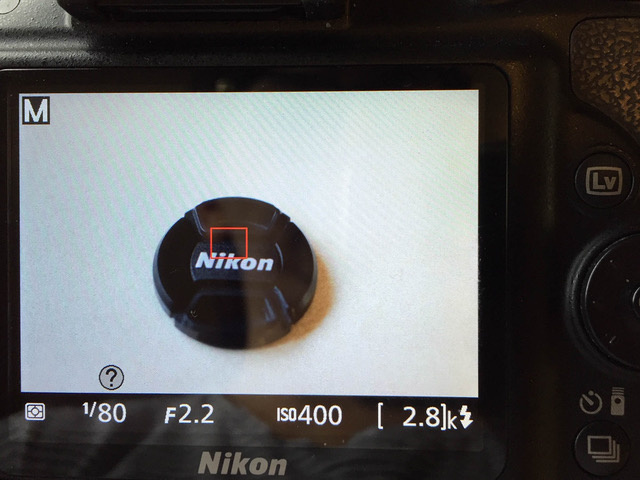
Live View button
You can use this option by activating a switch button on your camera, as show below for Nikon.You will notice that the autofocus is slower in Lv mode, but is a great alternative for indoor pictures (pic 2 - Lv small button)
We will start working today in manual mode and test the ISO factor on your camera. If using a smartphone, then tapping on the screen should be a great starting point, we will have more technical settings in the upcoming modules.
As a general rule, considering the indoor / outdoor light, you can set your ISO at:
Starting with an ISO of 800, we will experience Noise in a picture, which we will cover in module 5 when approaching light again.
For low light conditions, you can use a tripod, (I use one from Manfrotto). Especially when shooting indoor - for example in product photography, no matter the time of the day, I highly recommend using a tripod.
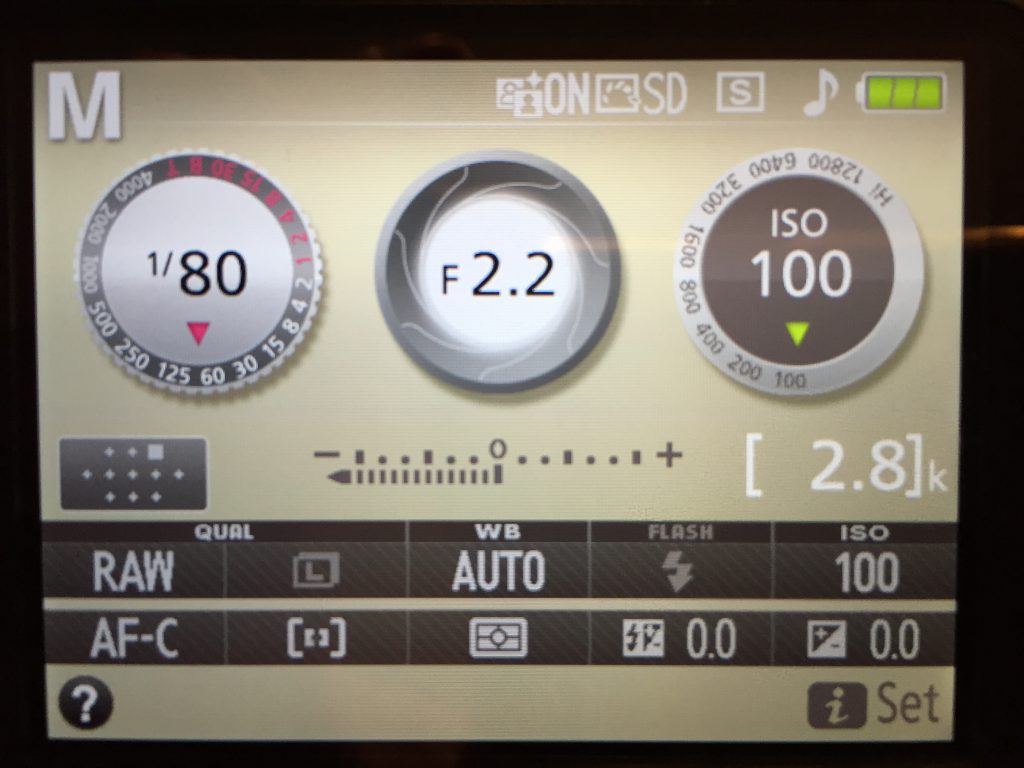
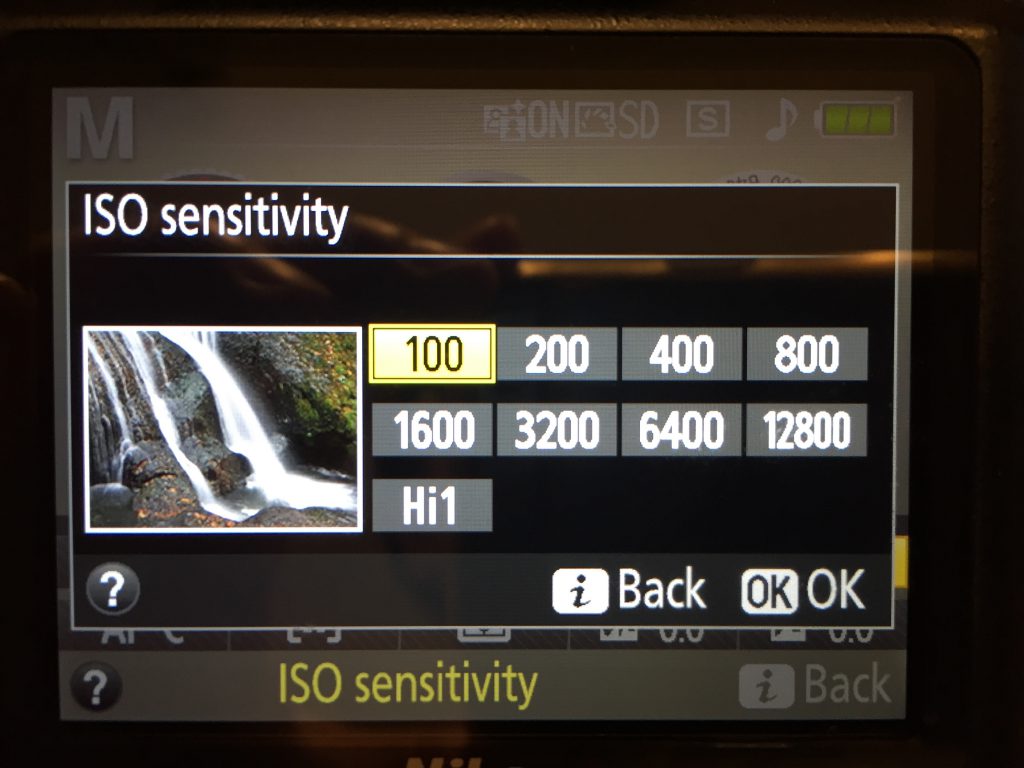
Setting your ISO
I attached below a picture as the information is displayed on my screen. For a Nikon, you can find it by pressing the Menu button and then under Settings / Info display format. On this display, you can adjust your ISO factor by pressing the “i” (Information) button, and then scrolling to the ISO setting.
Example of Pictures
Each set below gives you examples of pictures with different settings. I’ve used mainly a fixed 50 mm lens. If you don’t have one yet, I highly recommend you buying one in the near future, the price for a lens with a f/1.8 aperture is pretty accessible (around USD 150).
When taking a picture, these three factors are interconnected all the time: ISO, aperture and shutter speed.For illustration purposes, the accent below is on ISO.
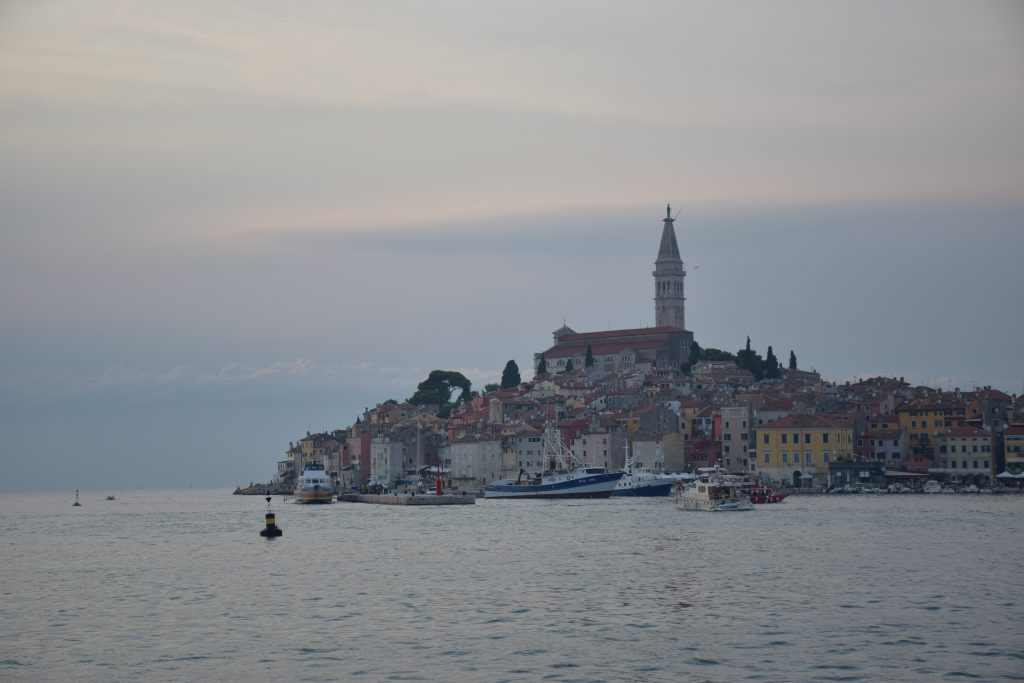
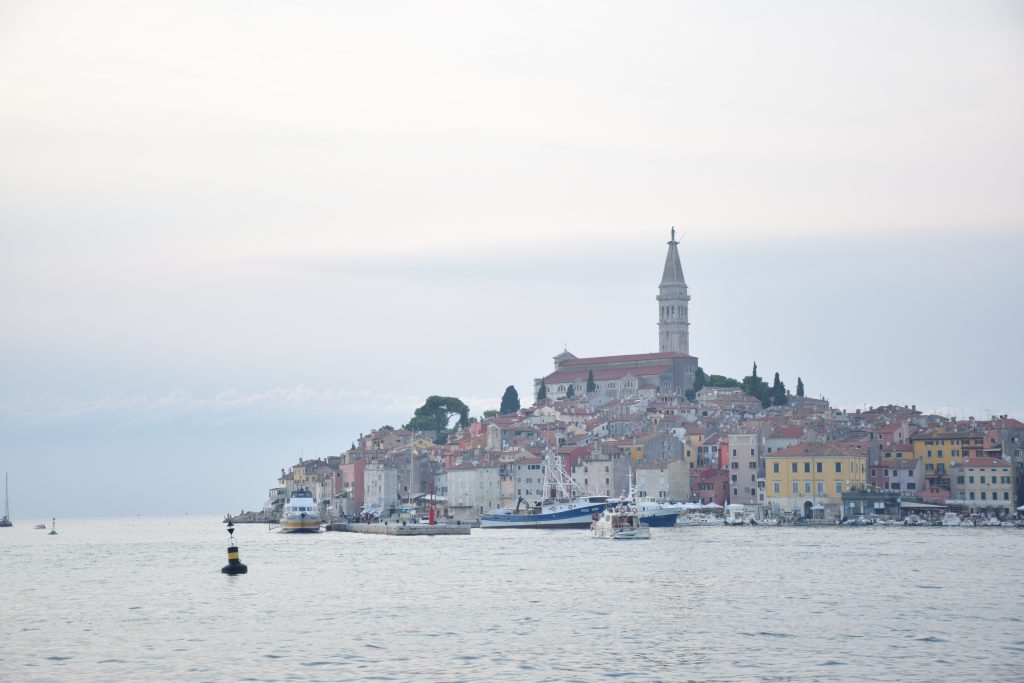
Set 1
For this first set, the ISO was changed but I kept the aperture (f stop: f/4,8) and shutter speed (1/640 sec) constant, at the same level.The pictures were taken in the evening, around 8pm, in poor light conditions.It is landscape photography and for that particular setting (where water and the sky were reflecting light), I considered the ISO 400 as the most appropriate one.
Pic 1
Underexposed (just a simple rule, is easier to edit an underexposed picture and make it brighter then the opposite)
Pic 2
Ok, considering that my target was to underline the combining grey effect between water and the sky
Pic 3
Overexposed, there is too much light in the picture.
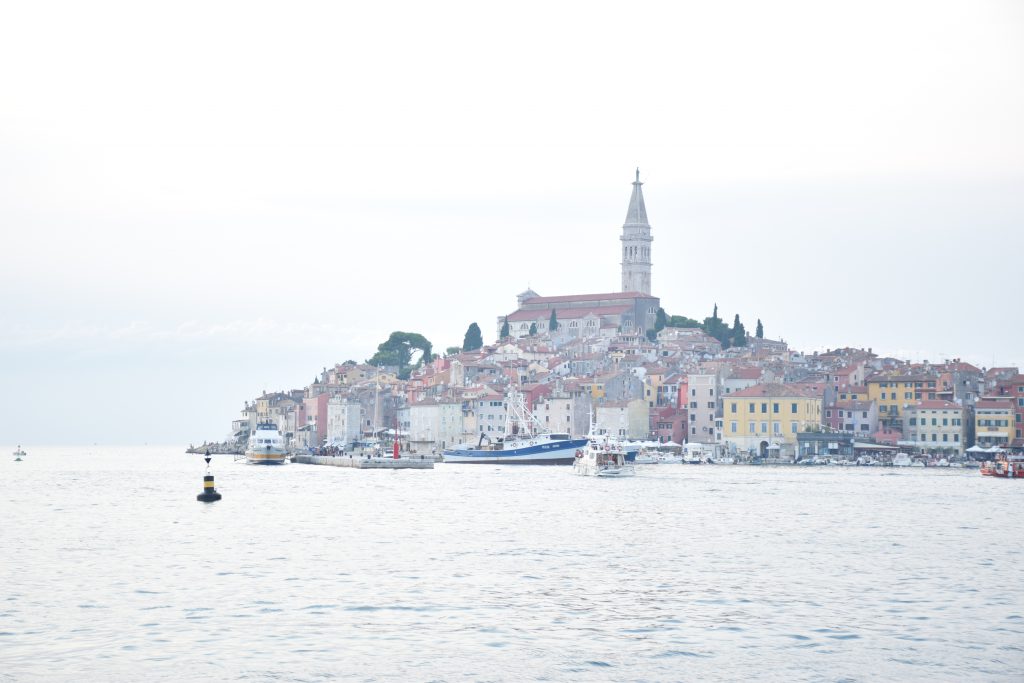
When moving to editing in Lightroom, the histogram will show if a picture is over- / underexposed:: - for underexposed pictures, the shaded area moves to the left side, - for overexposed pictures, the shaded area moves to the left.
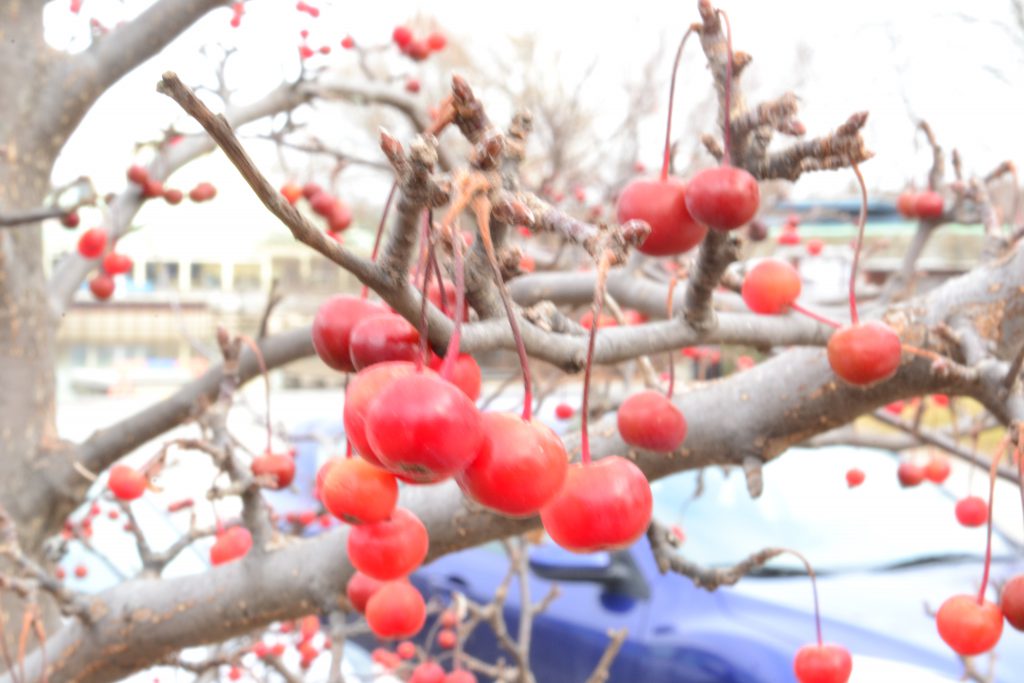
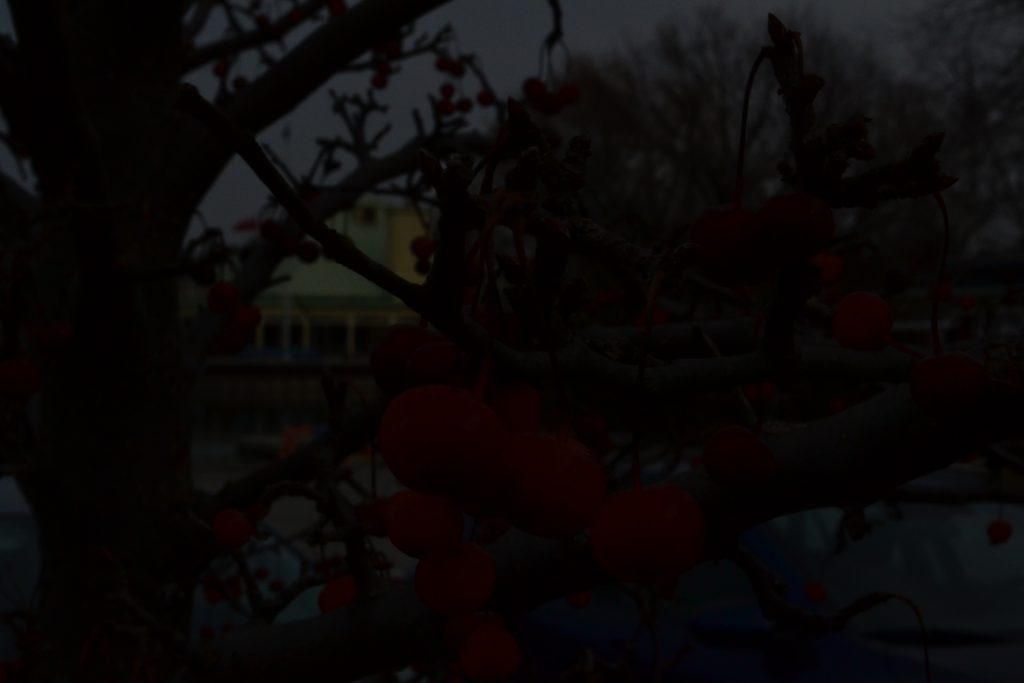
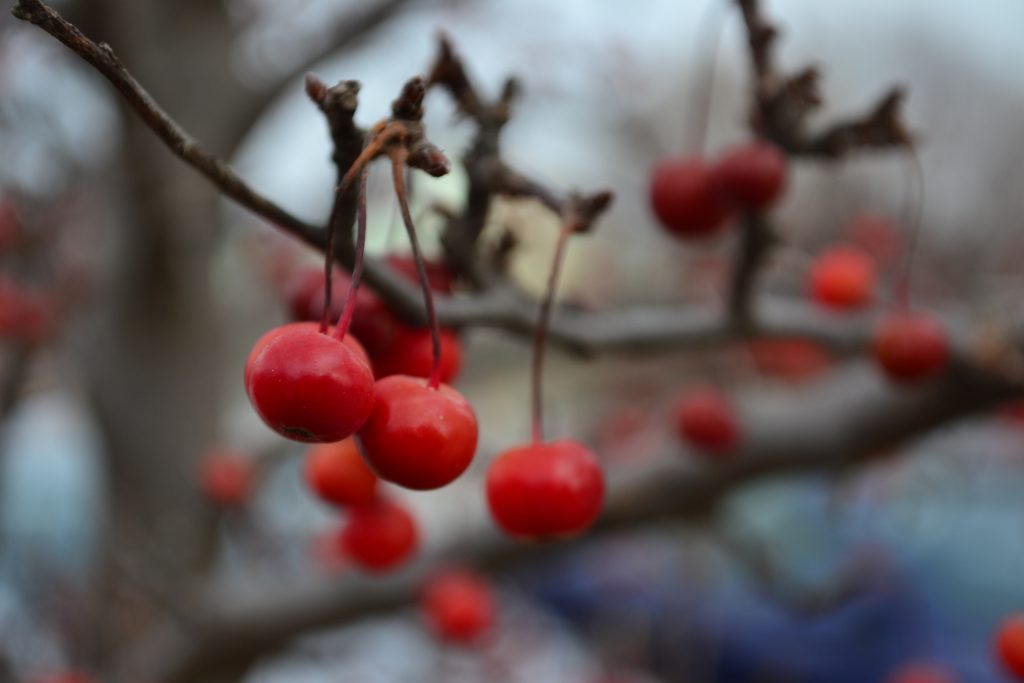
Set 2
The pictures were take on a cloudy day, around noon with strong light; for such weather conditions, the general rule would be an ISO of 200.My purpose was to highlight the beauty of those red berries - in order to have them in focus and make the other berries in the background slightly blurry, I picked an aperture or f stop f/5.6.
Just for the purpose of comparison, you can notice in the overexposed picture that I have more berries in focus and that is because I used an aperture of f/22 - this will give me a wide depth of field, so that I can have more berries in focus.
Pic 4
Overexposed, but the main push of light is given here by the shutter speed value of 0.4 sec.I have several berries in focus - not my purpose, I simply want to have a few in foreground in focus, to create a specific emotion.
Pic 5
Same ISO as in pic 04, but it is underexposed because of the shutter speed.
Pic 6
Ok for the weather conditions, I adjusted the followings:
- I reduced the ISO at 100 so that the picture is not too bright
- I adjusted the shutter speed ( I compare it always to a opening/closing door) to 1/100, so that I receive more light in my picture
- I adjusted the aperture at f/5.6 so that I focus my attention only on a couple of berries in foreground, not on all berries from the background
Set 3
Here are some indoor pictures, taken during winter time towards evening, the room had almost no natural light. These are taken again with a fixed 50 mm lens.
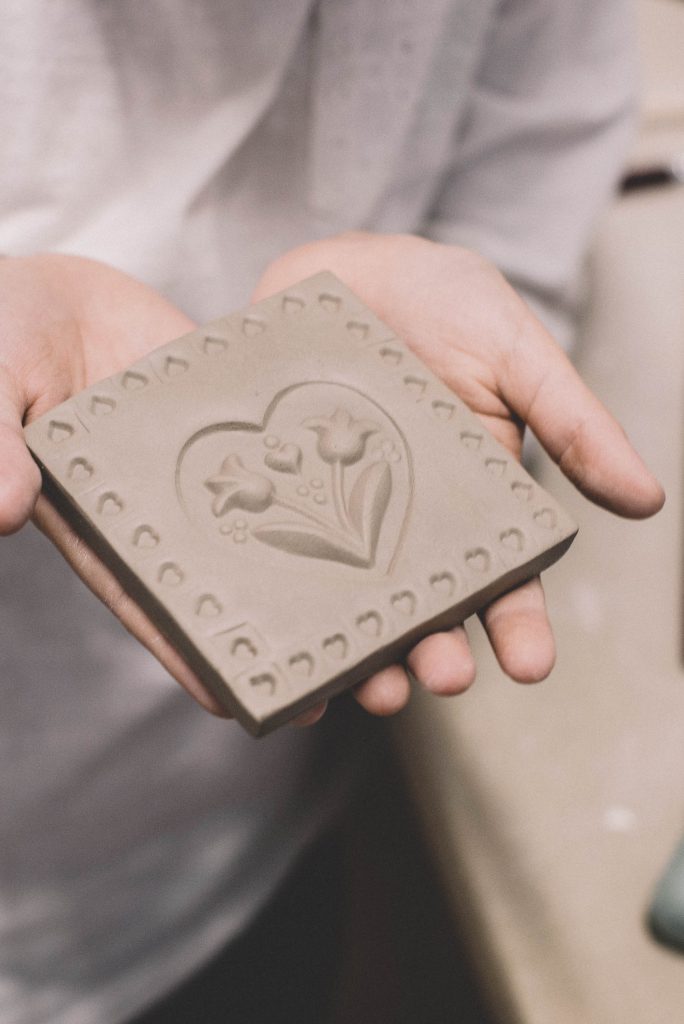
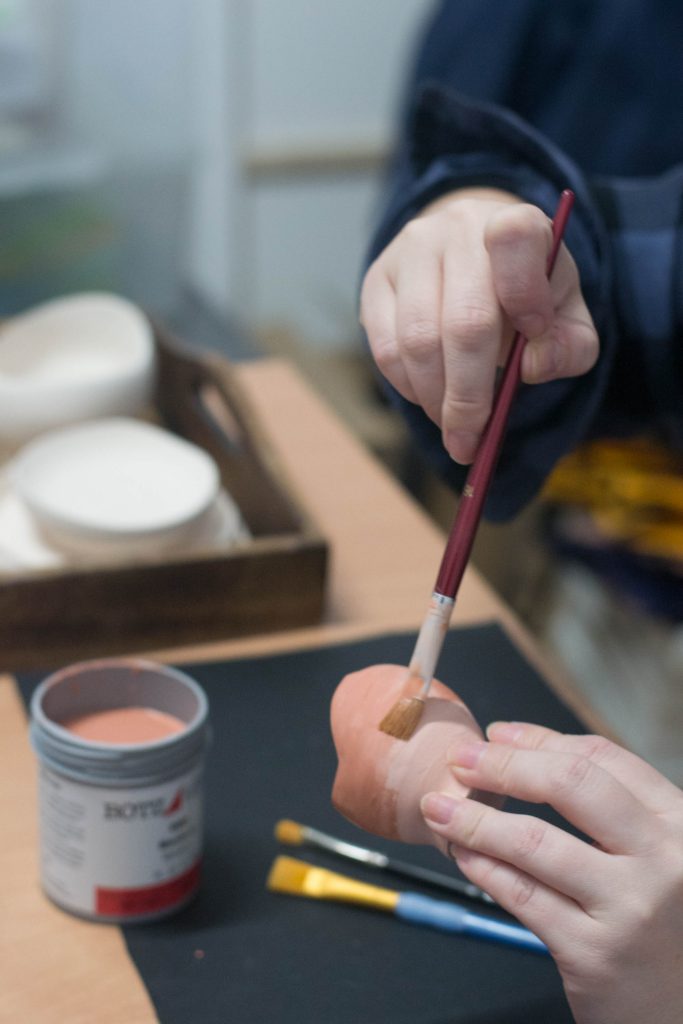
Pic 7
Increased ISO, the addition in light is given by using the shutter speed at 1/60 - this factor lets more light in.I wanted to re-create that intimate feeling of someone working with clay, in my pottery studio, and therefore have the focus on the person and the action.By using an aperture of f/2.2, the background becomes blurry, meaning I have a narrow depth of field.
Pic 8
Same same conditions and purpose as above, my intention was to capture the beauty of the work done by a child, therefore only the product is in focus.
Pic 9
Same conditions and purpose as above, my intention was to capture the moment of painting a fired piece of clay, therefore only the product is in focus.

Conclusion