We will approach the next technical setting when trying to find the best light for our pictures: Aperture.
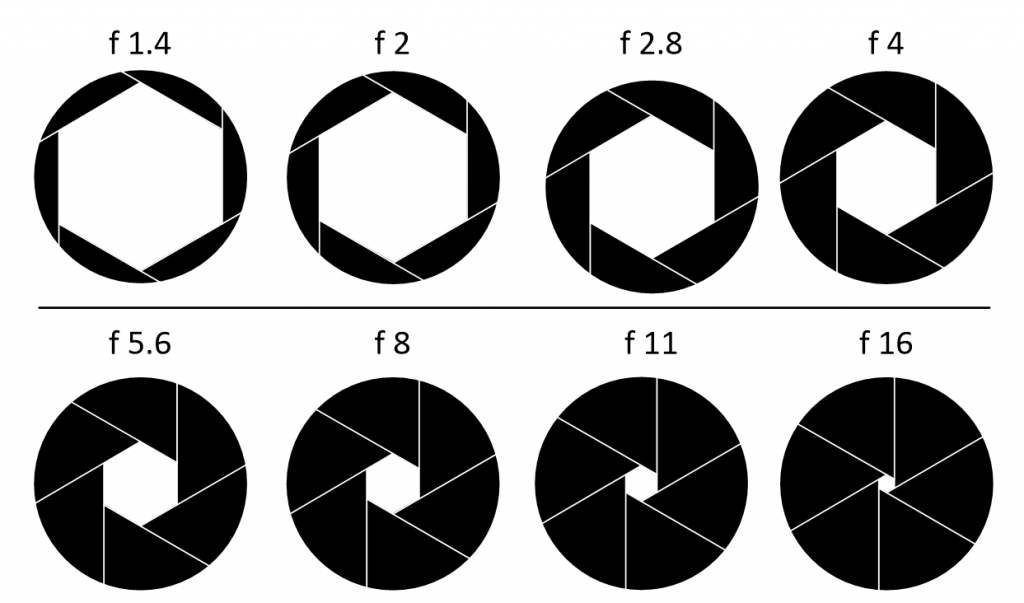
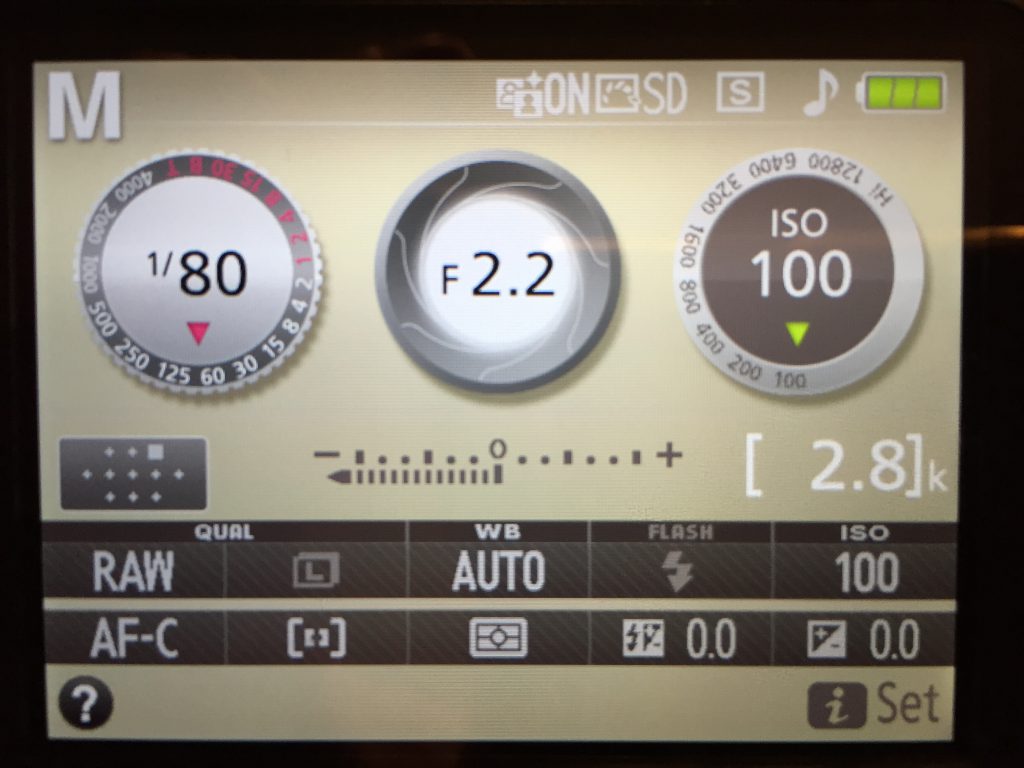
The main question for the aperture setting is what do I want to have in focus?Aperture is shown by the sign “A” (on a Nikon camera) and is measured through “f-stop” numbers.It controls how much light enters through a lens - as an example, it is shown in the middle of the screen in my display format below:
The most common comparison is to a pupil in the eyeball:
- if very sunny outside, our pupil is closed and lets less light in and this correponds to a higher f-stop (e.g. f/22)
- if poor light conditions, our pupil is dilated and lets more light in and this correponds to a smaller f-stop (e.g. f/1.8).
The f-stop number will result in a narrow or wide depth of field and it can be classified as:
1.narrow / shallow / blurry or fuzzy background - linked to a large aperture (small f-stop number) :
- your main subject is in focus, drawing the attention to it, with a blurry background
- results when using a small f-stop number (f/2.2 for example)
2.wide / deep / sharp elements - linked to a smaller aperture (high f-stop number):
- when all / almost all elements are in focus
- results when using a high f-stop number (f/22 for example).
You can use the f-stop numbers below as a general guidance:
Example of Pictures
Each set provides you with examples using different settings; again, I’ve worked mainly with my fixed 50 mm lens and with my Iphone. For illustration purposes, the accent below is on aperture / f-stop number.
Set 1
The pictures were taken on a cloudy day, around afternoon.
Pic 01
A high f-stop number of 5.6 brings in focus more elements.
Pic 02
Portrait photography, the focus is on the person; if you can chose between focal points, pick one on the face, around the eyes.
Pic 03
A high f-stop number of 5.6 will bring in focus more elements.

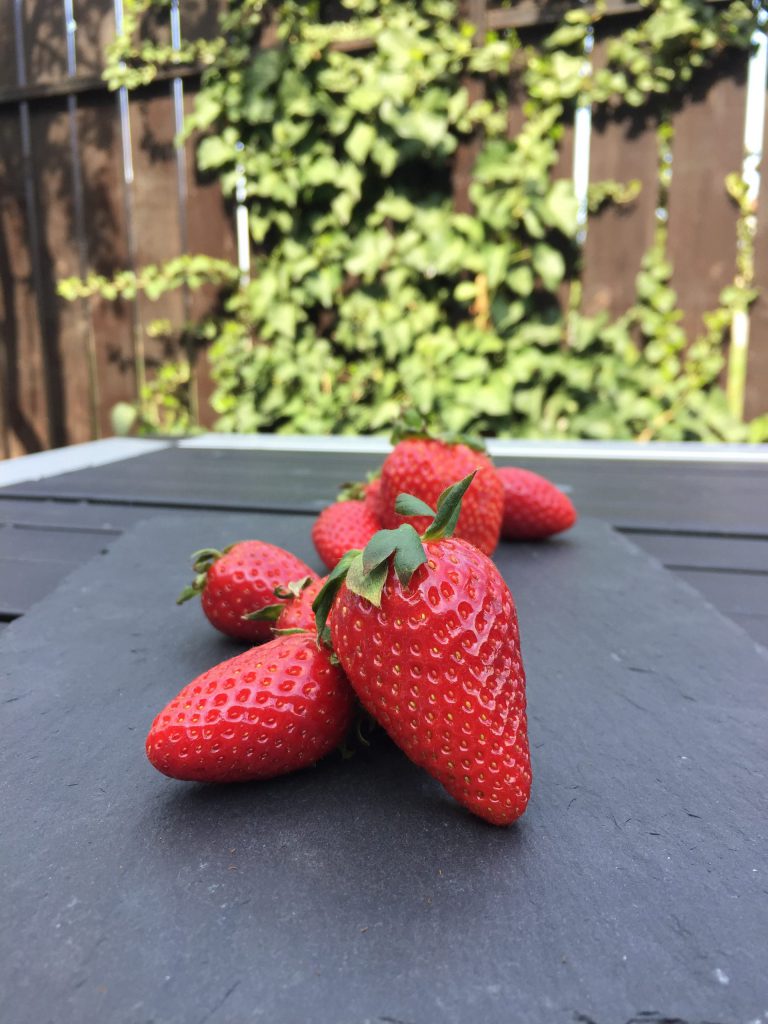
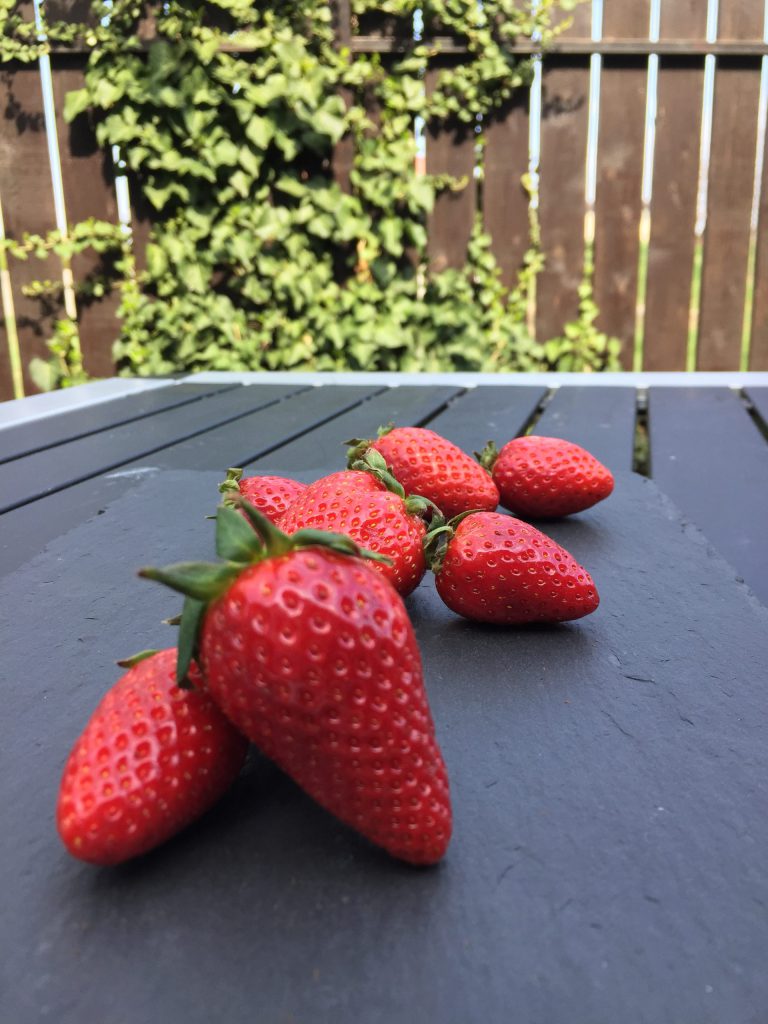
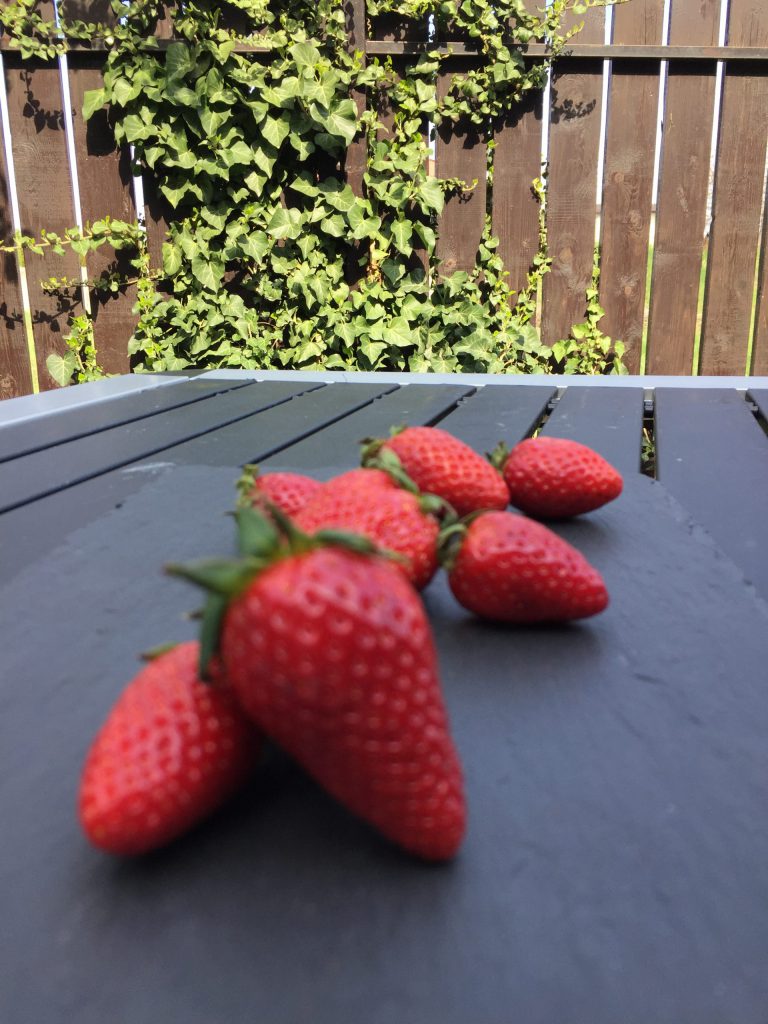
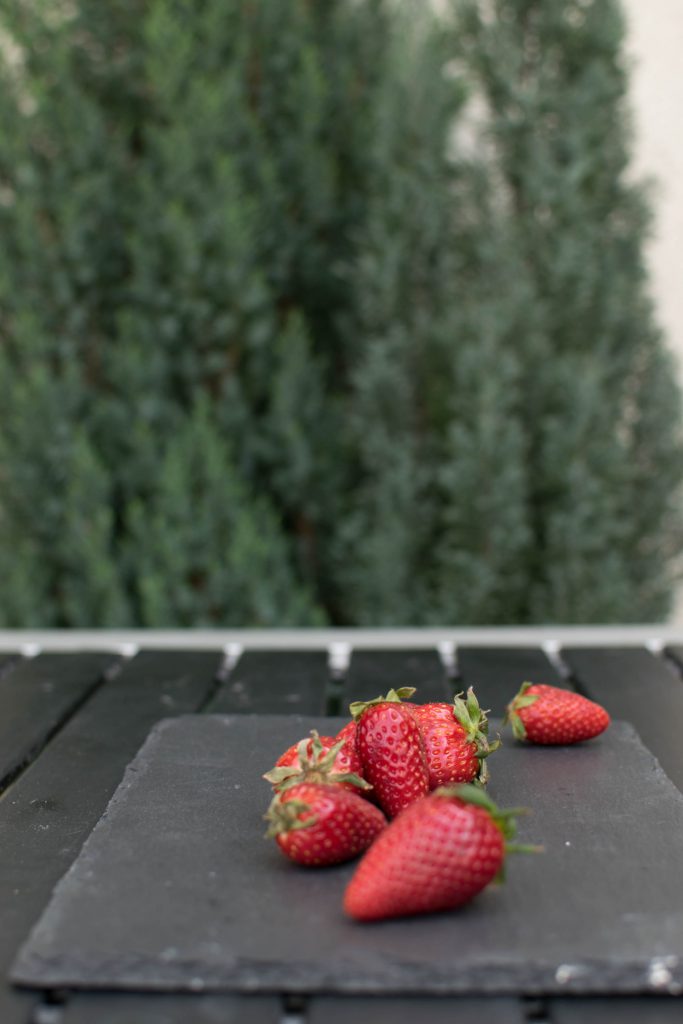
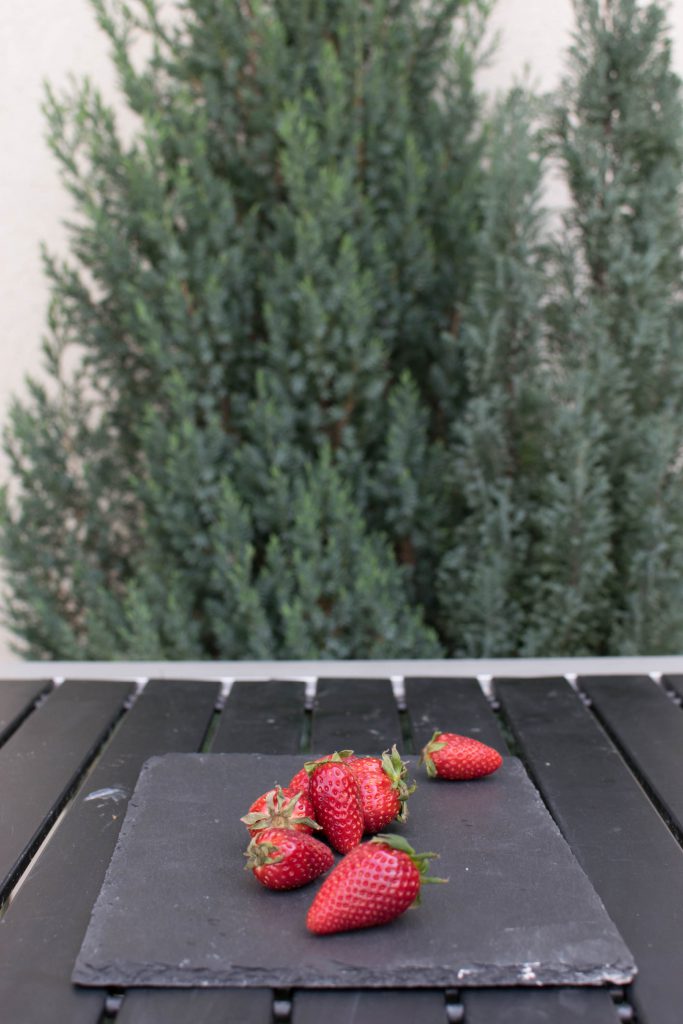
Set 2 - Iphone Photography - Depth of Field
When taking pictures with your smartphone, the easiest way to get a subject in focus is by tapping on the screen on the main subject - first strawberry in line in our case.Just remember, if you want to get a blurry background, there should be at least a small distance between the main subject and the background: in this case, the first strawberry and the foliage.
Pic 04 Focus on first strawberry ; Narrow DoF ; Blurry background
Pic 05 Focus in the middle of the row ; Narrow DoF ; Blurry background
Pic 06 Focus on the foliage ; Wide DoF ; Blurry foreground
Set 3
The pictures were taken on a very sunny day, around afternoon, in open shadow, using a 35 mm fixed lens.
Pic 07
A low f-stop number of 1.8 will bring in focus the first strawberry, with a very fuzzy background.
Pic 08
More strawberries in focus, the little tree in the background has more focus on its branches.
Pic 09
Almost all strawberries are in focus, the little tree has even more focus on its branches.
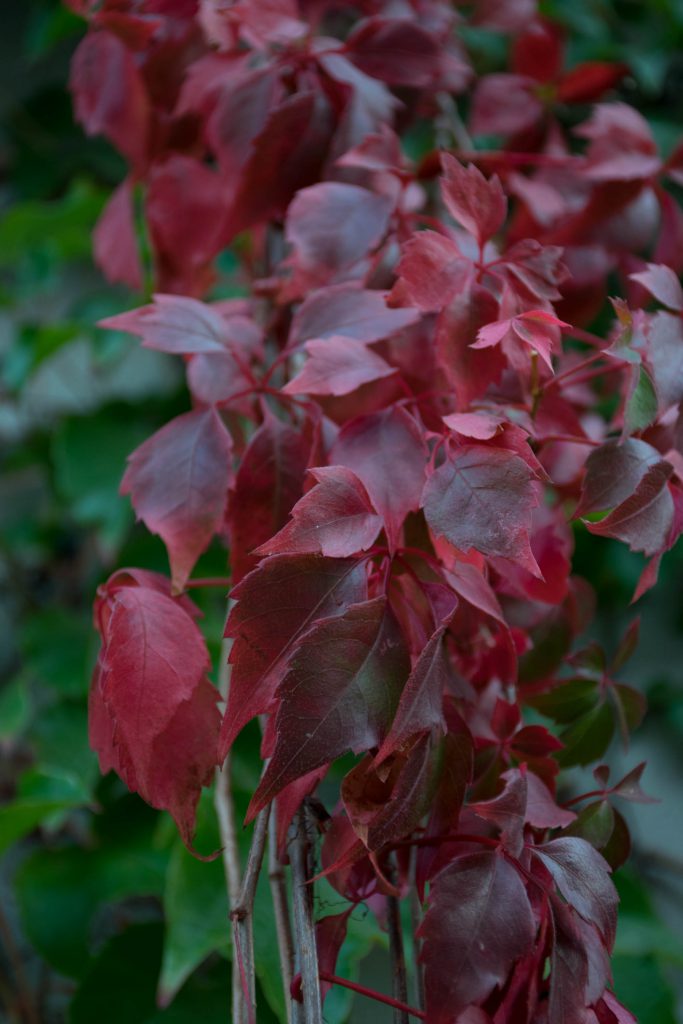
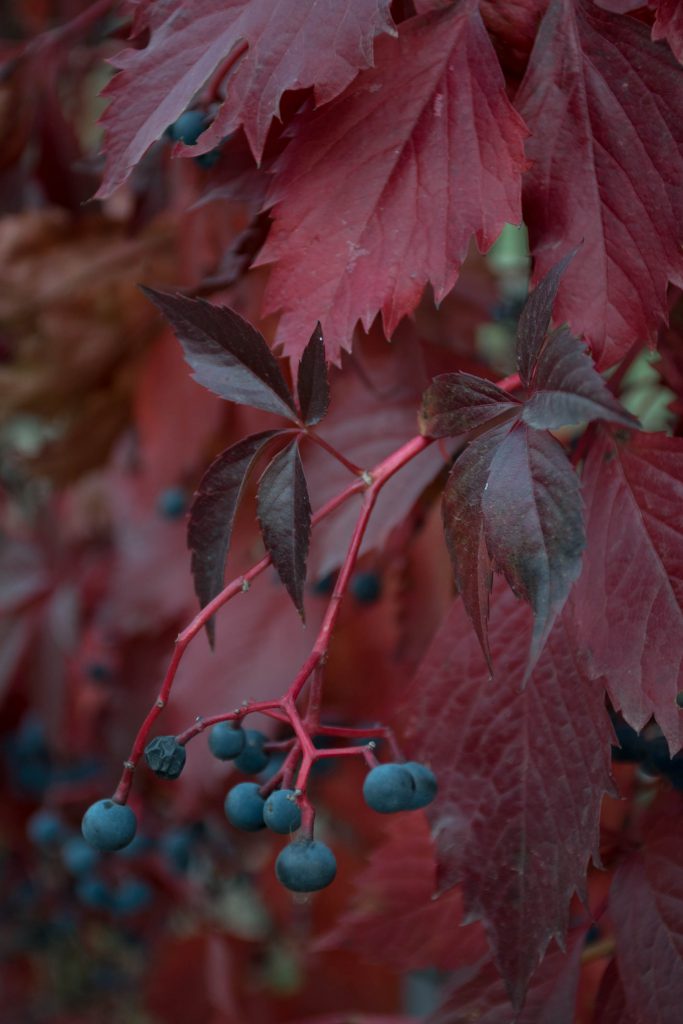
Set 4
The pictures were taken on a fall day, towards evening, when the light got poorer.
Pic 10
Almost all leaves in the foreground are in focus, due to the large f-stop number.
Pic 11
Again, almost all leaves in the foreground are in focus, due to the large f-stop number.
Pic 12
Small f-stop number allows to focus on that specific leaf.

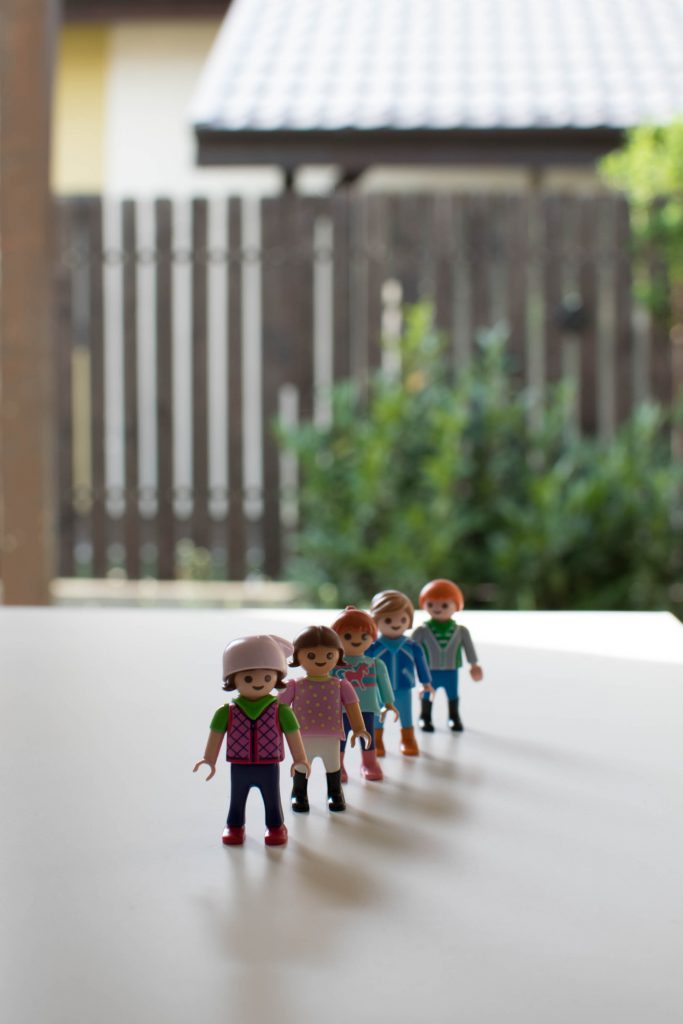
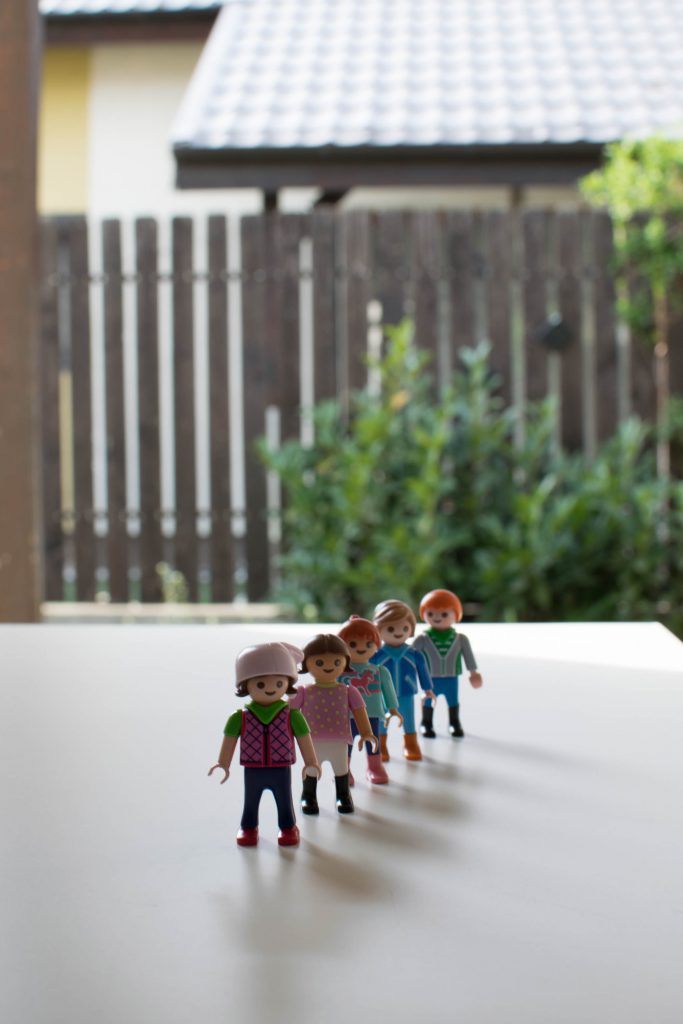
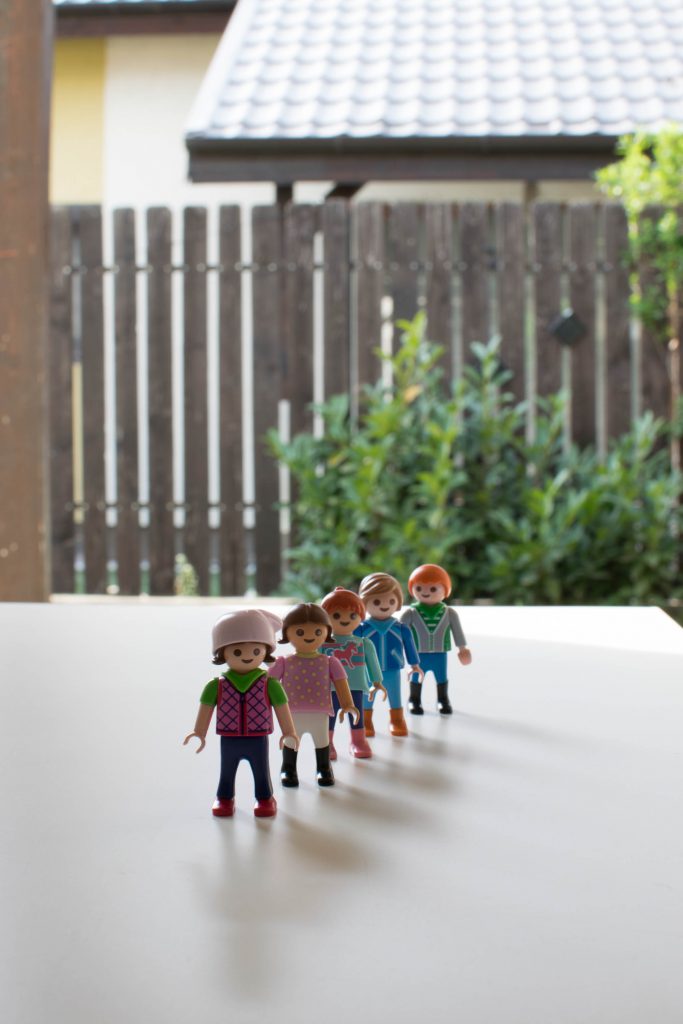
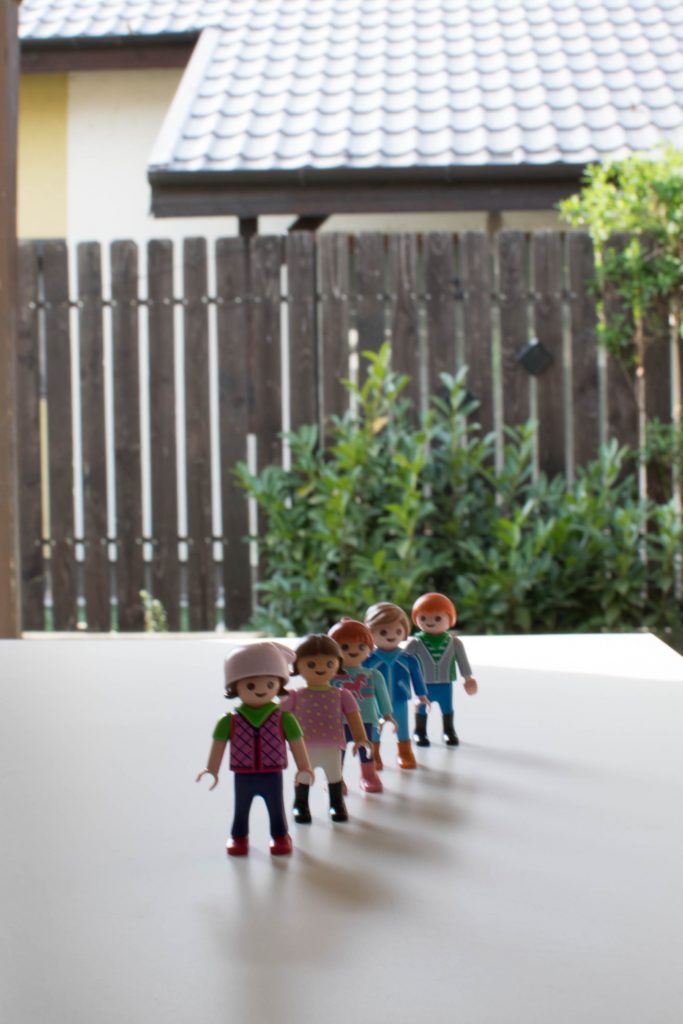
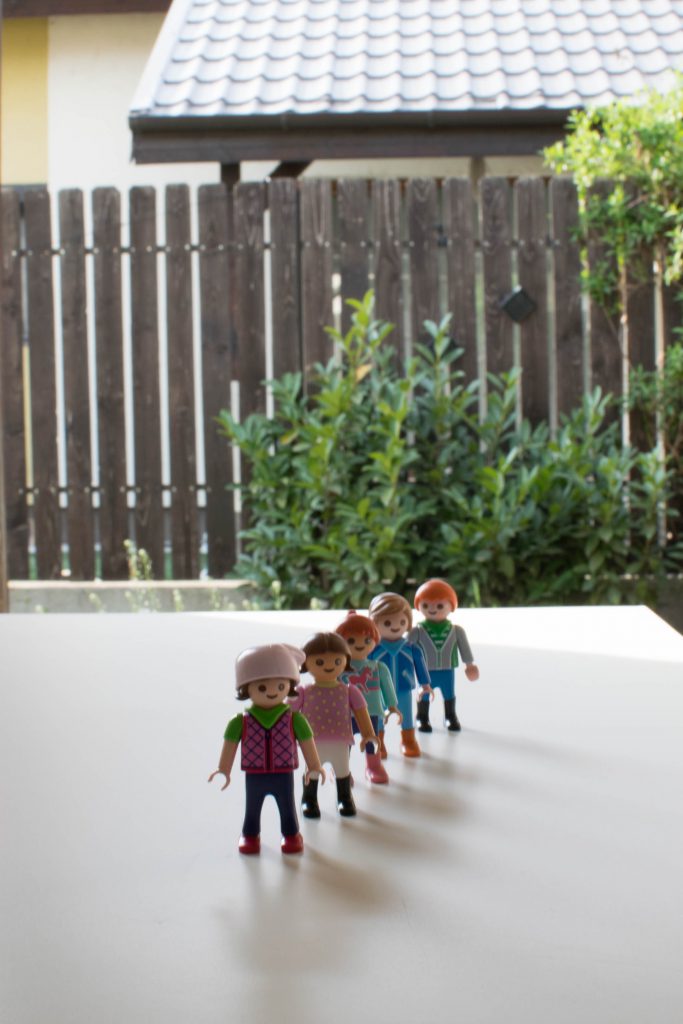
Set 5
For illustration purposes - on how focus changes from one to more elements - according to a different f-stop number, I picked some Lego toys.The main focal point is always on the first Lego toy and I kept the ISO factor at 100.You will notice from one picture to another how elements get in focus, from the first toy to the fence and the foliage in the last picture.


Conclusion