A great picture, in terms of light and composition will always enhance the quality of the main subject, of your product, of the message you want to transmit with that particular image.
This way, it becomes an extension of your brand, your product or services, especially if you are a product-based entrepreneur.
The customer looking at your pictures will think “Oh, these pictures are terrible, I can’t see with clarity the details or the light is poor or the colours don't seem realistic (over or undersatureated) and so on...
In order to have a well exposed image, we are actually looking for a soft even light, to flatter you main subject or the elements.
When searching for this perfect light, you must check:
- how strong is the light? do we have a harsh light or harsh shadows?
- is it direct or indirect light?
- does it come from above, below, in front, side on or from behind?- what colour is it?
We can experience the followings modes when dealing with light: direct - indirect - diffused (filtered) light:
- direct: light coming from a direct light source (sun, flash)
- indirect light: light that is bounced back (a wall, a white foam board)
- diffused: light that is filtered (natural light from sun filtered by clouds or artificial light from bulbs filtered - using a softbox)
-----------------------------------------------------------------------------------------------------------------------------------------------------------------------------------------------------------------------------------------------------
A. Outdoors - natural light
- natural direct light: using direct sun light can result in harsh light or harsh shadows and colours can be washed out, and the result is an overexposed picture
- natural indirect sun light: you can work in open shadow
- natural filtered / diffused light: an overcast day, when clouds are practically acting as a filter - best light; same for a foggy day - no shiny spots or harsh shadows, only gentle ones (or a sunny day when you used some filters (can be fabrics) and they can act as a filter.
------------------------------------------------------------------------------------------------------------------------------------------------------------------------------------------------------------------------------------------------------
B. Indoors - natural light
- natural direct light: same as for outdoors, the direct light you have immediately next to a window or a door, an extension to “outdoor” light
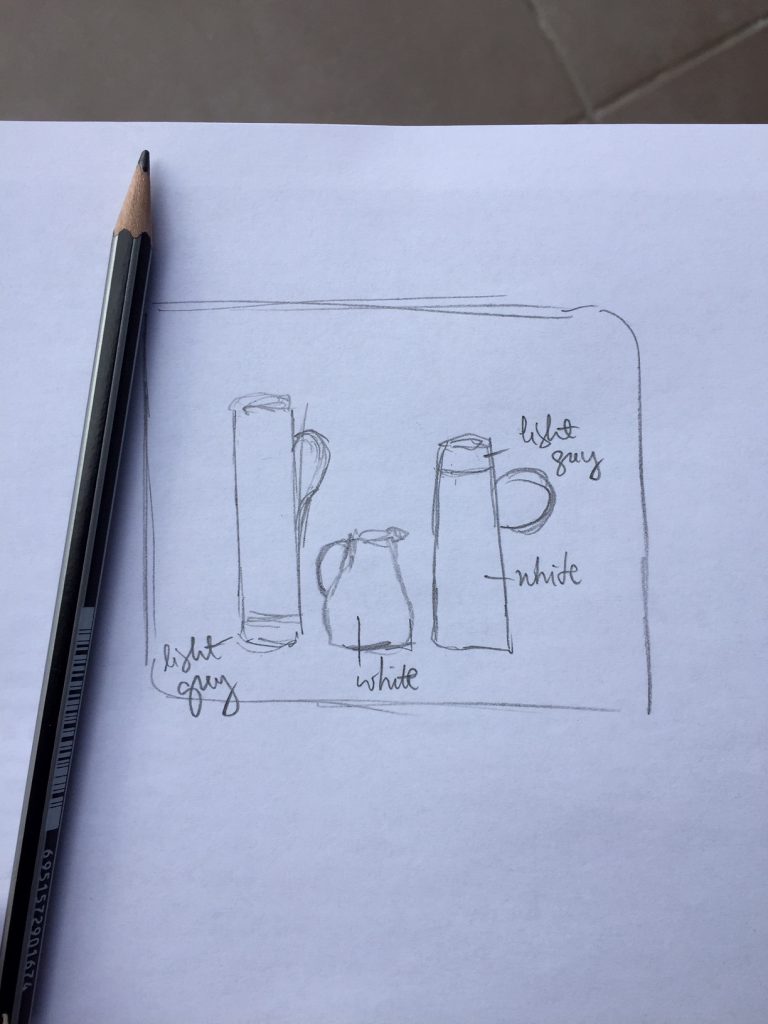
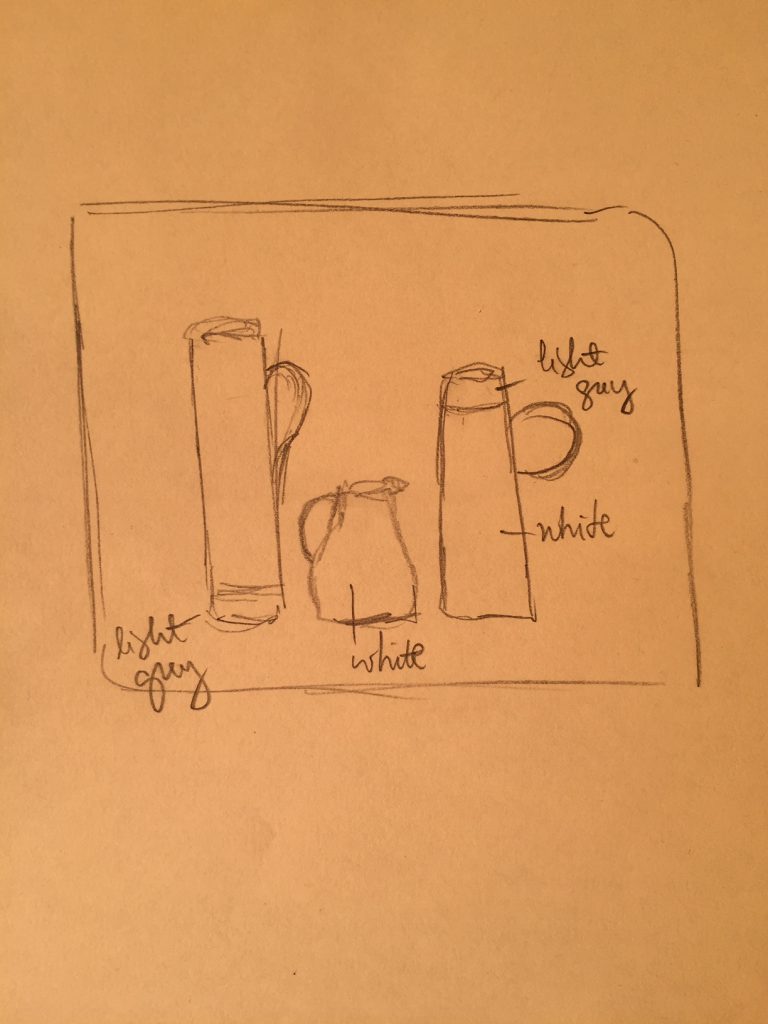
- natural indirect / reflected light: best light is the light reflected by a wall or by a white board - the light travels from the sun and it will disperse into the room; the further the light has to travel (until it meets a wall or any surface so that it can bounce back), the more it will be dispersed.
Example: Let’s consider a room with red walls – what happens? Light enters the room through a window, passes your product and losses into the room. What actually happens is that light travels to those red walls, will be impregnated with a tinge from the color of the walls and will bounce it back to your object.
- natural filtered / diffused light: can be obtained when we filter the strong sun light with a fabric for example.
---------------------------------------------------------------------------------------------------------------------------------------------------------------------------------------------------------------------------------------------------------
C. Indoors - artificial light
- artificial direct light:for example light coming from a lamp or
- artificial filtered / diffused light: best using a softbox.
Ideally, you should avoid taking pictures in direct light (sun or a flash from a camera) and search for spots with soft even light.
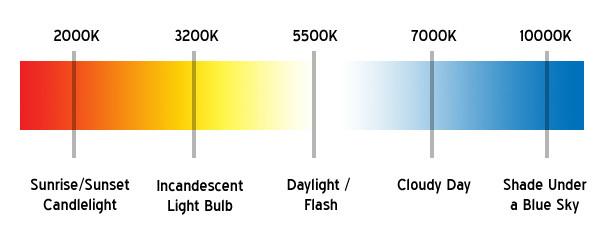
Light has a specific colour temperature, measured in Kelvin grades (K).
Color temperature refers to the spectrum of the light. Although it may look white to the eye, basically any surroundings will influence the white balance (which works as an engine for color management):
- direct mid-day sunlight is around 5,500-6,000 K - average color temperature to produce accurate colors
- regular incandescent light bulbs are around 3000 K
- an open shade, may get a color temperature of 10,000 K.
The higher the Kelvin temperature, the cooler the image & and the lower the temperature, the warmer the image:
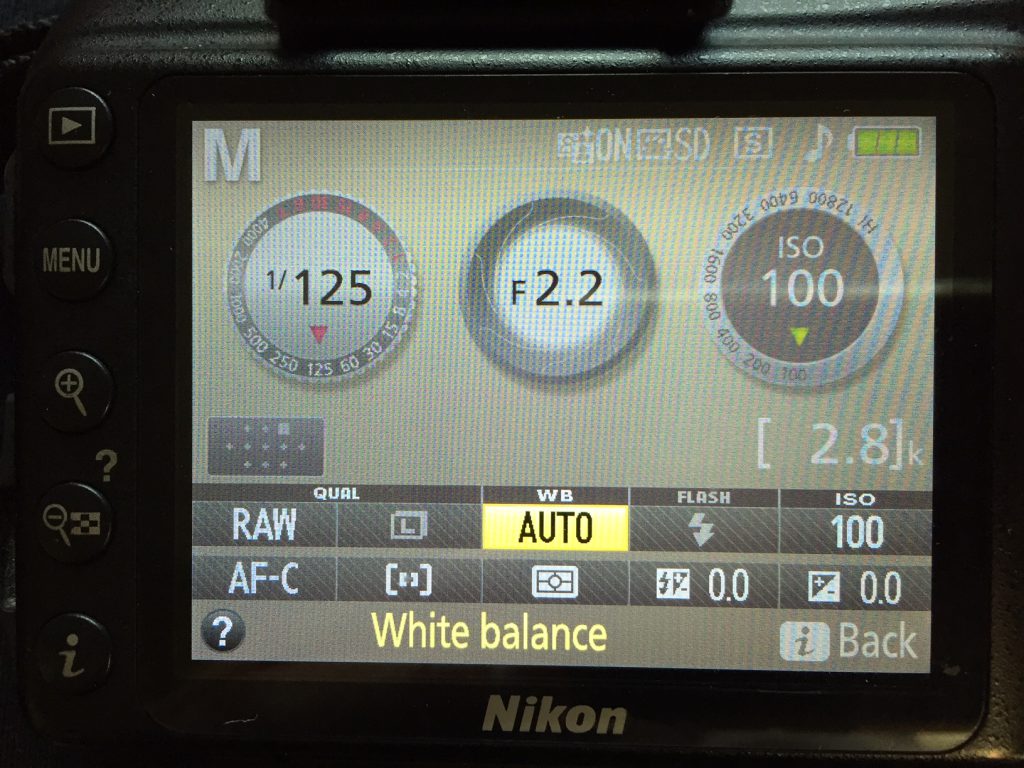
What your camera is trying to do is correct itself to a standard white.
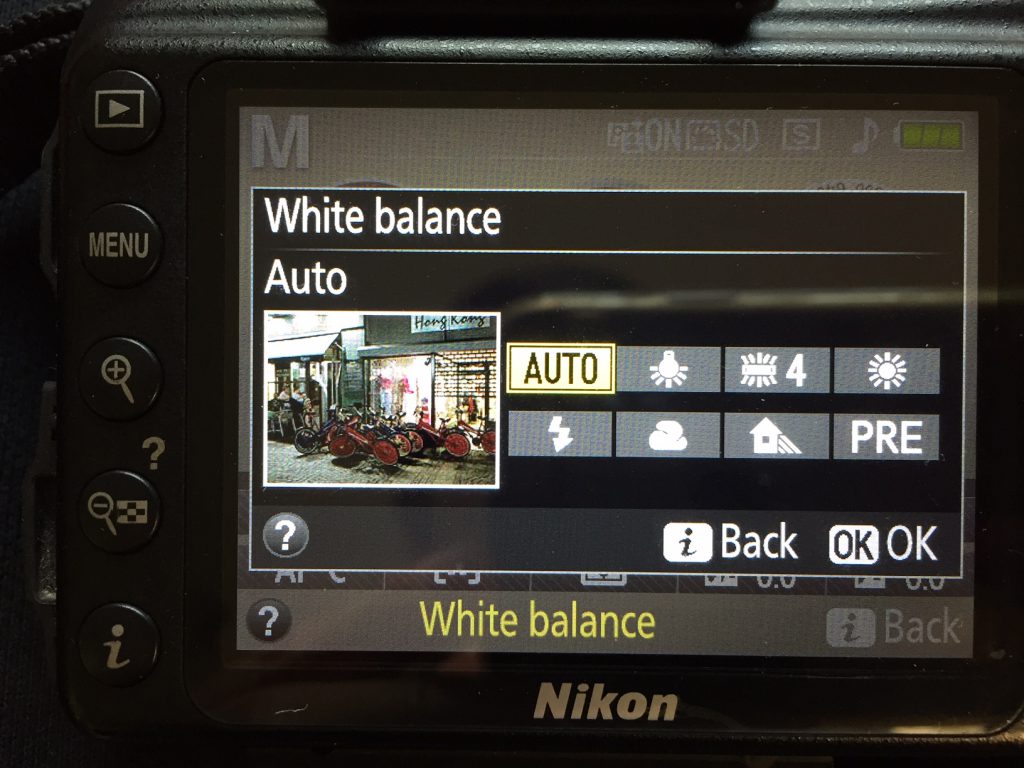
The white balance on your camera can usually provide you with different modes: auto, cloudy, fluorescent light, etc. I recommend you leave the white balance on auto and work on the temperature in post-editing (the auto WB guesses at the color temperature of the light, translating that value to an overall average that tends to be okay for most conditions):
Practically, if a picture looks too warm or cool, it needs a White Balance adjustment.
Here are some examples with same piece of paper and pictures taken at different times of the day: morning - afternoon - evening, which actually shows that the white balance is actually not balanced:

A good test could be when you start taking pictures: take a sheet of white paper and shoot some pictures and check the result - is the white relatively accurate?
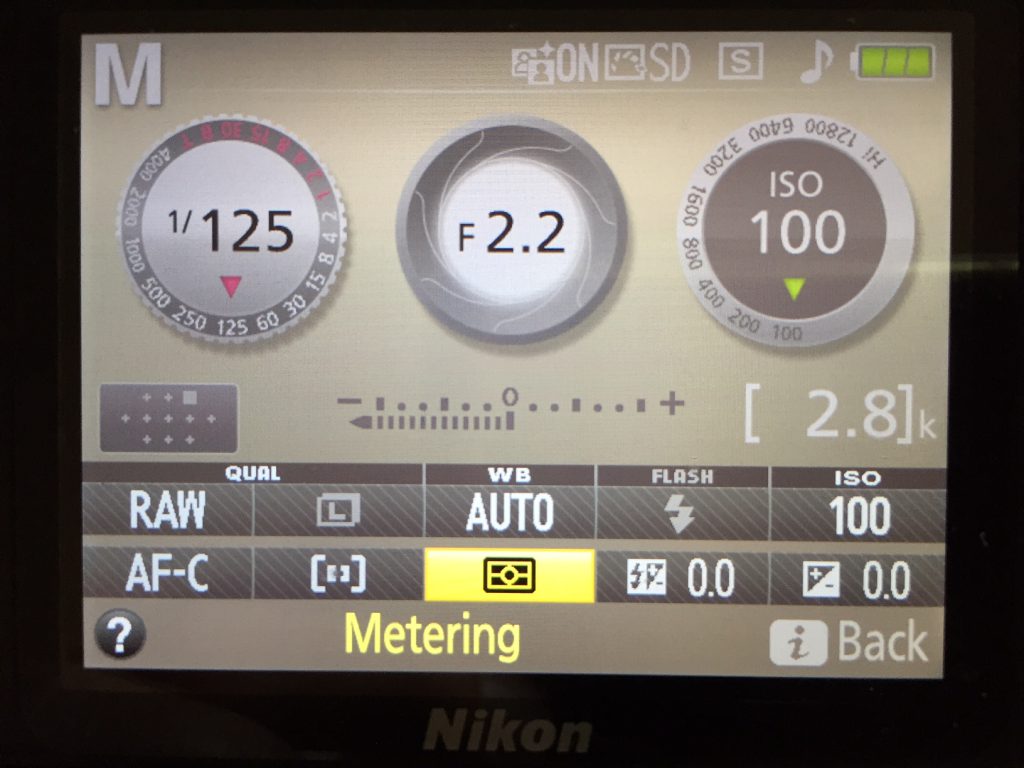
Metering
In order to get a good exposure, the camera has a built-in tool: a light meter that measures light (same as a thermometer measures the temperature/heat of our body).
This light meter is used to determine the exposure, to understand how intense the light is - and this tool is called metering:
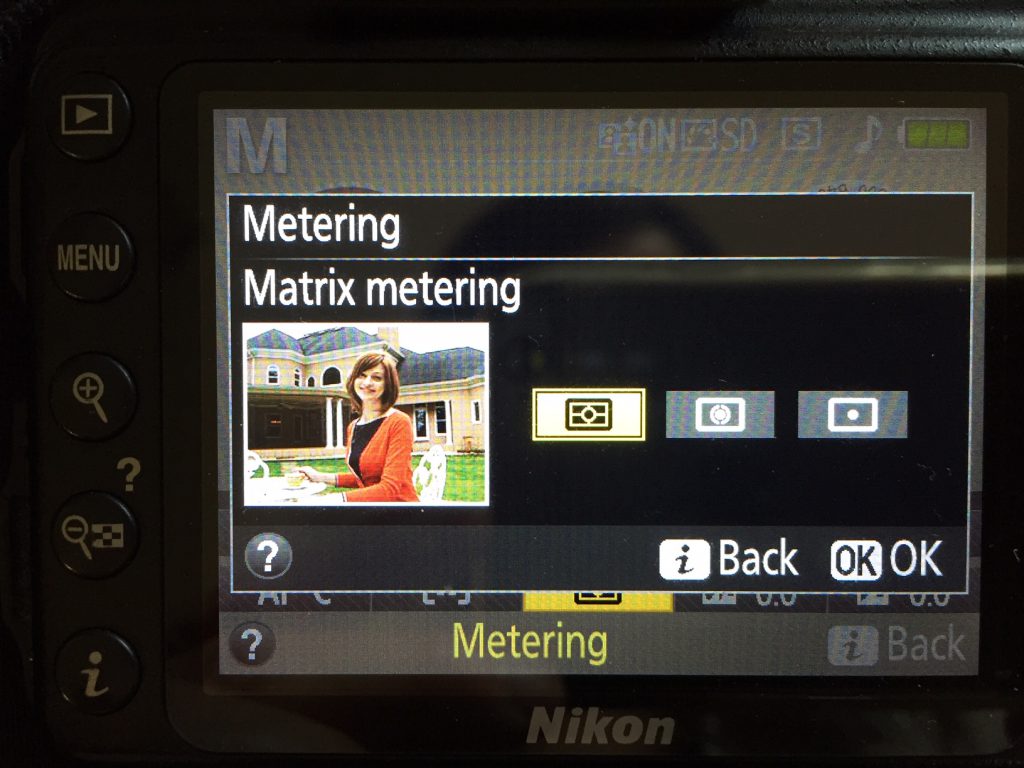
Metering modes with a brief explanation:
- Matrix metering - looks at the whole scene and considers an average - it works well in evenly lit areas
- Spot metering (partial metering, centre weighted) - takes a spot, and focuses on your main subject to get the exposure right (let’s say on a face in portrait photography)
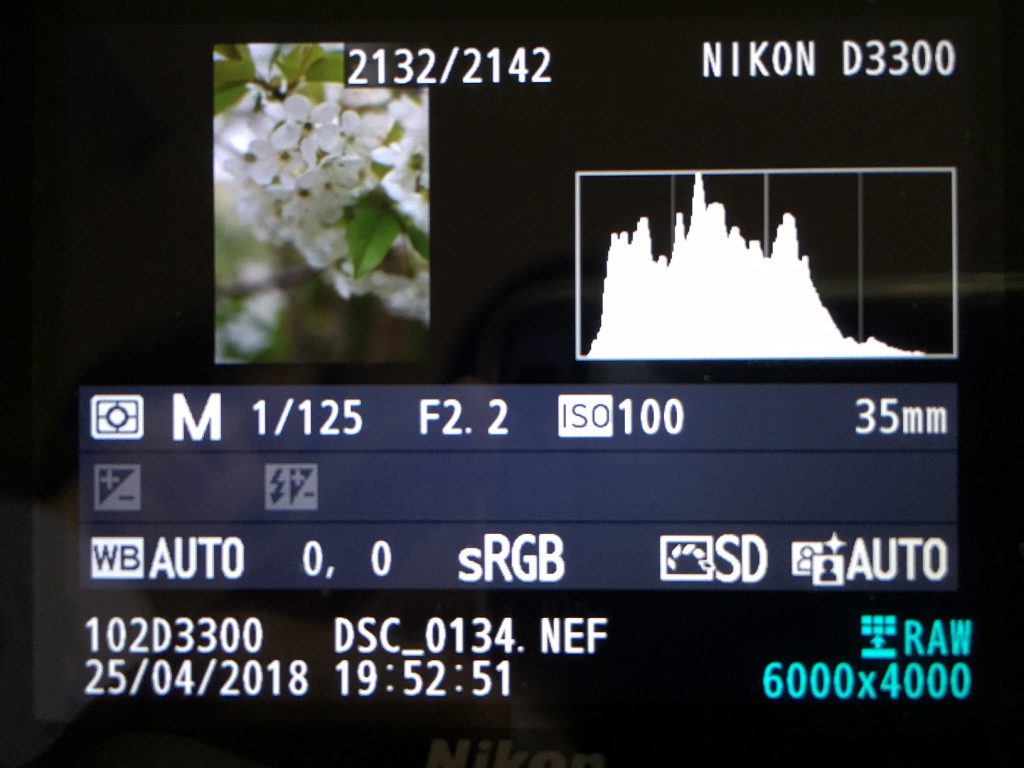
Histogram
You can check you exposure by reviewing the histogram on your camera for a specific picture.
Each time you take a picture, look at it and examine the histogram - if the light is grouped on the left side, the picture is underexposed, while on the left it gives us an overexposed picture: